

There’s nothing like getting into a hot car on a summer day… But there’s nothing worse than jumping into a hot car that was built between the late ’90s and mid-2000s, reaching for any piece of trim that was covered in that faux-leather-look rubberized plastic and getting your hand sticky. You know the stuff I’m talking about, that molten-tar that immediately leaves you with a black smear of melted rubber residue on your hands and clothes. YUCK!
From our experience the Germans went gonzo for this new interior styling technique and seem to have dipped their entire interiors in this mess, leaving us with mobile La Brea Tar Pits on 90+ degree days. We’ve seen this “schtuff” (that’s the technical term for it, btw) appear across all brands we’ve come in unfortunate contact with during this build period – to include Ferraris! And if you’re a VW owner, you know EXACTLY what I am referring to, its everywhere.
Who is to blame for creating and selling this nightmare product to the automotive masses? – well, that remains a mystery. But maybe the value prop during the sales pitch went something like this: “Its an affordable way to plus up your injection molded items to make them (air quotes) ‘feel-like’ higher quality leather items found in more expensive vehicles. It’s textured, cool to the touch and UV-resistant. You’re going to love it, and your customers will too.” — Whomever it was, this person, this group of sadistic mad scientists, or dreaded bean counters … they signed off on a seemingly cheap and innocent solution not thinking (or legitimately long-term testing) the kind of gift they were going to bestow upon the automotive community in the near future. There’s no doubt looking back 20 years, they laughed all the way to the bank while our cars continue to seemingly melt in car parks across the world. (sigh) </rant>
 This HVAC trim looks like it has a disease.


OMG – EWW!
I’ve heard stories of people selling perfectly good cars and throwing away clothing because of how bad these interiors can become. But being a bit of a mad scientist myself, more like MacGyver – and still enjoying cars from this era – I’ve been looking for a way to combat this “goop” in my interiors for years. I’ve tried all sorts of solvents, balms, salves, cleaners, detergents, acids, heck even Carb-&-Choke cleaner (aka Acetone) and straight Gasoline. Nothing seems to work, nothing seems to make it better, only waaaaay worse. Up until recently I had just given up, figuring it was near impossible to rid an interior of this plague, and replacing the parts just meant delaying the inevitable. But like Archimedes (who figured out buoyancy while in the bath tub) solutions often come to me during the oddest times. Earlier this week, I literally tripped over a 5-gallon jug of ZEP’s (water-based) industrial parts wash and degreaser in my shop. Cursing its existence as a waste of money, I moved it to the side and carried on with my work. My EUREKA! moment came to me in the middle of the night and the next morning I decided to head up to our favorite salvage yard: CHAZ’s Used Auto Parts and go dig up some melting specimens and test out my hypothesis.
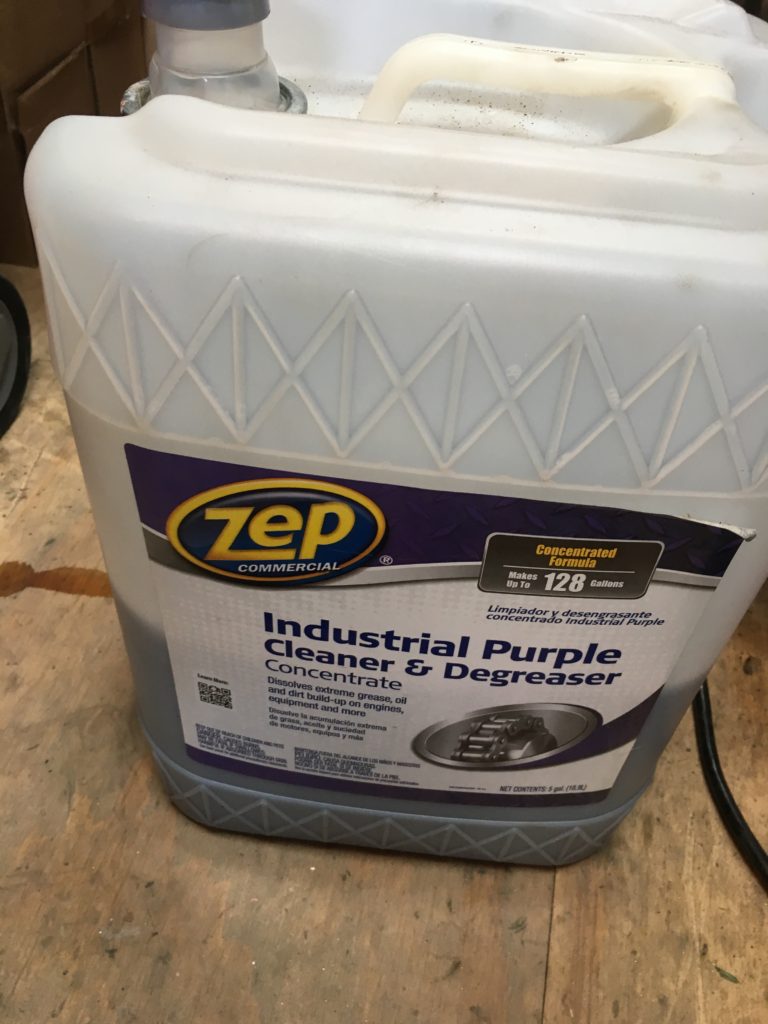
Like all great ideas, they start off simple. For this to work you need something that is strong enough to loosen the rubber finish without damaging the part. Any solvent, acid or petroleum based liquid is too strong, and also tends to make the rubberized eczema react and become molten toxic waste, ruining the underlying plastic. You can’t sand it down and you can’t paint over it. As mentioned earlier, the water-based ZEP cleaner I nearly discarded, is just “okay” for washing heavily greased tools and parts. Classic mineral spirits are way more effective, that being said, I’d been ignoring it for a while. I’ll say it again, this time with meaning: it’s a water-based degreaser, this means it might be less caustic to the entire part. So what if…


I poured the un-diluted ZEP‘s into an an empty spray bottle to make distribution of the detergent more even across the parts. I decided based on the type of part they would have to “soak” for different periods, this really has to do with the overall thickness of the rubber coating. For small parts (like the center picture above) 2-5 minutes was more than enough. For larger parts like my center console the ZEPs needed to work for at least 20-30 minutes. I could tell right away that the ZEPs was working on my test part (the HVAC trim). Even with plastic gloves on, the “schtuff” was just rubbing off with a cold water rinse. WARNING: always wear gloves when working with this cleanser. I also recommend a paper mask when using the spray bottle so as to not breath in the fumes. Top-Tip: Member Tania M suggested I try a worn out scouring pad from the kitchen to make the job easier, and it sure did!
 This center console was left to sit for about 30 minutes; and then rinsed and scrubbed; the results were shockingly good!


I let all the parts air dry in the sun and had to do some touch up scrubbing, but over all I was happy with the results. A word of warning: don’t expect the plastic to come out one solid color after cleaning, from my experimentation I learned that different parts were made different ways and with slightly different plastics. More importantly the rubber coating was also used to hide imperfections in the molding. Additionally, each piece reacts differently to the degreaser. Some pieces stay black, others end up with a satin finish, others can have a milky-white haze. There are no guarantees how the pieces will react. This got me thinking… did I just make things worse? The stickiness is completely gone, but some of my trim looks super faded! At this point you really have two options: #sendit. Repaint with something that is designed for plastics or wrap in a high quality vinyl.
Option 1: Repainting
If you decide you’re going to paint the pieces to complete the refinishing process, no matter what color you chose, make sure it’s designed to work with plastics, or has a primer in it that will also help bond the paint to the object. Years ago, Valspar (usually found at Lowes) made a “for Plastics” line of paint which came in all sorts of outdoor furniture colors like maroon and hunter green – not ideal for this application, but they did also make a satin black. This paint was amazing and I’ve used it on all sorts of plastic parts. Figuring I would get some more, I was disappointed to find that none of the hardware stores in my area carry any sort of “for plastics” paint. This lead me to 2 alternatives.


The rattle can on the left is a 2-in-1 paint and primer in “Canyon Black; Satin Finish” from Rustoleum. Doing some quick research on the paint, I discovered that it’s a quick drying paint designed to work with all materials, especially plastics. I recommend multiple thin coats from different angles to achieve that OEM look. And remember, satin isn’t going to be shiny, it’s between flat/matte and gloss, which is very similar to the look of the original rubber coating. But if you want to go extreme and accent your interior in lime green, go for it, this paint comes in about 30 colors. The can on the right is designed for metal and plastic bumpers, it only comes in satin black finish, but it DOES require an additional primer before application. I choose the easier and “new to me” path by using the “2X” paint instead of something I knew. The results were pretty awesome, after two coats, the parts are looking amazing! (below). Note: I got both of these cans at a local Home Depot and spent about $8.


Option 2: Wrapping
If you don’t like painting, you’ll hate wrapping. It’s very delicate, patient work and requires a wet or heat (gun) based approach. Vehicle wrap is different than the vinyl you are a probably accustomed to, like the thinner materials used for numbers & decals. Wrap vinyl is significantly thicker, stronger and better for shaping and stretching. Wrapping is really #WYSIWYG. If it looks terrible, there’s a good chance you will have to start over… many… many times. Bubbles are frustrating to say the least. Luckily, with a wrap like ORACAL, the vinyl can be relaid, stretched and formed a few times before you have to scrap it and start over. Be patient, work on smaller items first until you get comfortable working with the material, or ask for help from people in the business. Top-Tip: speaking with member Al A (hobbyist car wrapper) lead me to find the ORACAL products, which can be picked up on Amazon in small quantities and in varying colors. Feel free to reach out him for advice if you need additional help.
- ORACAL 651 comes in all sorts of colors, and Amazon sells it in limited quantities making it super cheap!


Option 3: The Quick’n’Dirty
Don’t have time for any of this… No fear! There is a last resort, don’t even clean the “schtuff” – just respray with Plasti-Dip and have a nice day; or burn the car to the ground and collect any remaining insurance money. Your call. LOL. But… in all seriousness – below are some more before/after pixs that might have you considering the previous options.
 HVAC TRIM: Top: before cleaning. Bottom: Raw plastic - so smooth!


Like any resto-mod project, all of this takes time and patience. Many of these pieces are old and brittle to begin with and need to be repaired once they are carefully removed. After that, this reconditioning process is pretty easy and best of all – CHEAP. The results speak for themselves. We hope this new method will give your car a fresh-new look/feel, getting you away from that sticky petri-dish – and making it an enjoyable place to live inside again. If you’re not interested in giving this DIY a try on your own time, we do plan to make some more of these mods for folks if there is interest, so please don’t hesitate to reach out!
#neverstoplearning #restomod


")


